Share
Pin
Tweet
Send
Share
Send
Do not rush to send old chairs or a chest of drawers to the cottage. They can be painted by turning into fashionable and modern interior items. To get everything perfect, follow a few simple rules.
"Colorful" furniture is fashionable
Looking into the windows of fashion stores with designer furniture, you will definitely see in them tables, chairs, chests of drawers and cabinets painted in different colors. Although the "living" natural texture of wood was and remains popular, painted furniture in the interior today looks fresh and modern, adding personality and character to the image of the room. In addition, painting is a great way to change the interior without buying new furniture, or to restore old items instead of sending them to the cottage or throwing them away. By the way, designer "multi-colored" furniture usually costs a lot of money - and you can achieve the same effect at home and for much less money.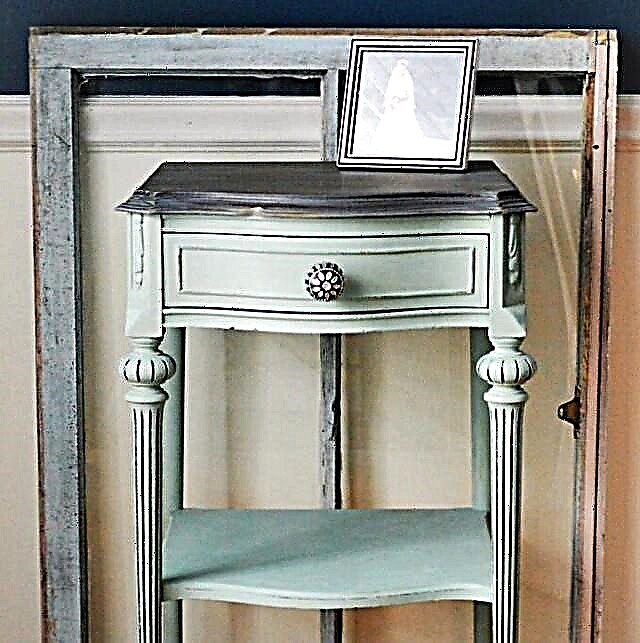
Photo: @dixiebellepaint

Photo: @withlovefurniture

Photo: @withlovefurniture

Photo: @fairy_chalk_mothers

Photo: @dixiebellepaint

Photo: @dixiebellepaint

Photo: @dixiebellepaint

Photo: @dixiebellepaint

Photo: @artistdonna
How to make an original chest of drawers with your own hands
Possible options
In the fashion several options for painting. You can completely cover the surface of the subject with a dense layer of matte or glossy paint of the same color. You can paint different furniture details in different colors (for example, play with shades of cabinet drawers or chest of drawers). You can apply a certain pattern or pattern to the surface (a bit more complicated work than just painting, beginners should take it with caution). Another option is to cover the furniture with a thin translucent layer of paint when the wood texture remains visible. Finally, the effect of aging is also in fashion - craquelure (imitation of cracked paint) or deliberate creation of scuffs, aging on painted furniture.
Photo: erinspain.com

Photo: diyprojects.com

Photo: restauracion-muebles-barcelona.blogspot.com

Photo: ranchoavellanas.com

Photo: iheartnaptime.net

Photo: trendsandbenefits.wordpress.com

Photo: memme. website

Photo: @withlovefurniture

Photo: owl-moebelhandel.de
Seasonal update: 5 spring workshops for your home
Preparation for work

Photo: @withlovefurniture
To begin, examine the piece of furniture selected for painting. It must be cleaned of contaminants, if necessary, repaired.
Prepare everything you need for painting: - paint of one or several colors (in the store focus not only on the color, but also on the type of paint - it is best to consult with the seller, explaining to him the essence of your idea and plans for its implementation);
- primer;
- if you need craquelure effect - an appropriate coating;
- finish coating;
- rollers, brushes, sponge, paint tray;
- two types of sandpaper, rough and fine;
- masking tape;
- gloves and clothes, which is not a pity to decorate with spots of paint;
- protective mask;
- newspapers to cover the floor;
- A few rags made of cloth without lint.
We paint furniture with aging: a master class
5 main rules for successful furniture painting
1. Sand the surface

Photo: diynetwork.com
There are many workshops and manuals assuring that this step is optional, there are paints on the label that say that you don’t need to sand the surface when working with them, but professional practitioners unanimously say: for a good result, sand it! If you are repainting a large item or furniture to remove old varnish or paint from, you may need a grinder. But, having patience and stocking up with gloves and a protective mask (so as not to breathe dust), you can properly sanded wood and ordinary sandpaper. For objects of complex and round shape, this method is even more preferable.First, remove the old coating properly and smooth out irregularities with a rough emery cloth (be careful not to overdo it by removing too much, especially when it comes to furniture made of chipboard). Then - walk over the entire shallow surface.
2. Clean the surface

Photo: diynetwork.com
The next step is surface cleaning. If the dust from the skin remains on the tree, the paint will fall unevenly, and subsequently it may well begin to move off in pieces. The effect of aging or craquelure (cracked paint) is best achieved by special methods. When you need a good even coating, after grinding, wipe the surface properly with a soft, lint-free cloth (the fibers may “litter” the coating).
3. Ground

Photo: diynetwork.com
Be sure to coat the surface with a primer before painting it. The primer not only improves the adhesion of the paint to the surface, making the coating more durable and durable. It impregnates the tree, protecting it from damaging external influences (moisture, sun) and fills small cracks and bumps. Prime the tree by following the instructions on the packaging of the product you have chosen. General recommendations: try to primer all even the most inaccessible places (use a brush for them) and let the primer dry well.
4. Better a few thin layers than one thick

Photo: centsationalstyle.com
To make the coating look good and last long, do not try to cover the entire surface with a thick layer of paint at a time. Absolutely exactly, it is unlikely to lie down, with a high probability streaks will form - all efforts for preliminary preparation of the surface will be crossed out. Better put one thin layer of paint, let it dry as it should, then evaluate the result. At this stage, by the way, it is easy to get rid of small blemishes - the same streaks or villi adhering to the paint (sand these places with fine sandpaper on dried paint). If, in your opinion, the coating is not dense enough, add a second layer. After it dries, evaluate the result again - and so on. However, too many thin layers of paint may also not look very pretty - usually three are enough.
5. Use topcoat

Photo: centsationalstyle.com
When choosing a paint in a store, consult which type of topcoat is best for it (by the way, you should do the same when buying a primer). When the painted object is completely dry, treat it with a protective topcoat - your work will please you much longer.
Main photo: pixabay.com
Share
Pin
Tweet
Send
Share
Send