Beautiful, unusual, made from improvised materials, the needle bar in the shape of an exotic flower will surprise you with its ease of manufacture.

You will need:
► Flap of cotton fabric with any branch print
► scissors
► Green paint of dark and light shade
► brush
► Awl
► Decorative nikty
► Needles and thread for sewing
► Sintepon or any other filler
► Three toilet paper sleeves
► Simple pencil
► stationery knife
► Cardboard
Do-it-yourself unusual needle ring-ring
Step 1

Spread the bushings. Using a clerical knife, make slots and petals.
Step 2

Match the details.
Step 3
Cut out of cardboard bottom with a diameter equal to the diameter of the tubular sleeve.
Step 4

Green paint on the parts inside and out. Leave to dry.
Step 5
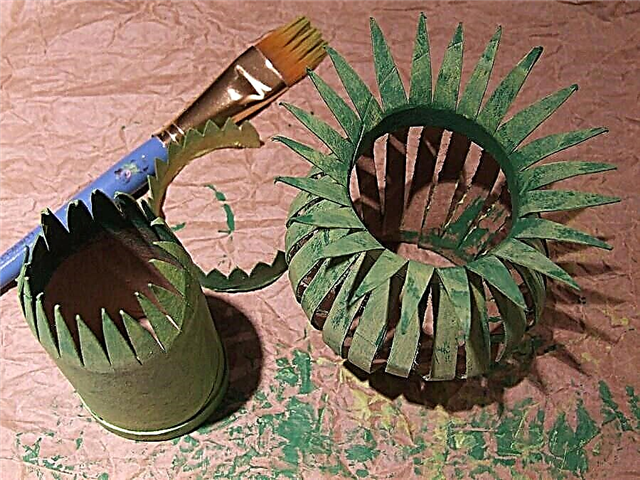
With a green paint of a light shade, create an ombre effect. Leave the parts to dry completely for a day.
Do-it-yourself needlewheel on the wrist
Step 6

Glue the crown part to the high tubular part.
Step 7

From a fabric with a floral pattern, cut out a rectangular part (the base of the needle bar) with a length equal to the circumference of the tubular part and a height equal to the height of the tubular part as well.
Cut a circle (the bottom of the needle bar) with a diameter equal to the diameter of a tall tubular part.
Cut allowances - 1 cm.
Step 8

Fold the part of the needle bed base with the face inward, aligning the short sections, and grind.
Stitch the bottom to the base.
Step 9

Turn the part to the front side and fill it with padding polyester.
Step 10


Align basting stitches along the edges, pull the thread and fasten it firmly.
Needle-mouse: do-it-yourself accessories you need
Step 11

Insert the resulting part of the future needle bar into the high tubular part.
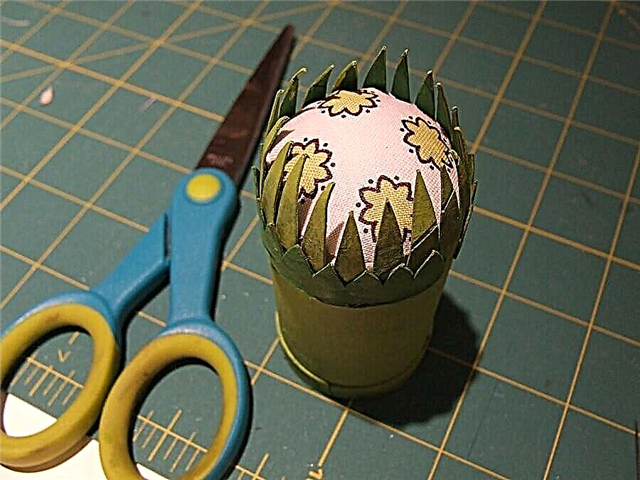
Step 12

Pre-awl make holes in the details, as shown in the photo.
Step 13


Sew the bottom to the flower-shaped part using decorative threads.
Step 14
Place the tall tubular part in a flower-shaped part.


The needle bar is ready!
Source and photo: michelemademe.com